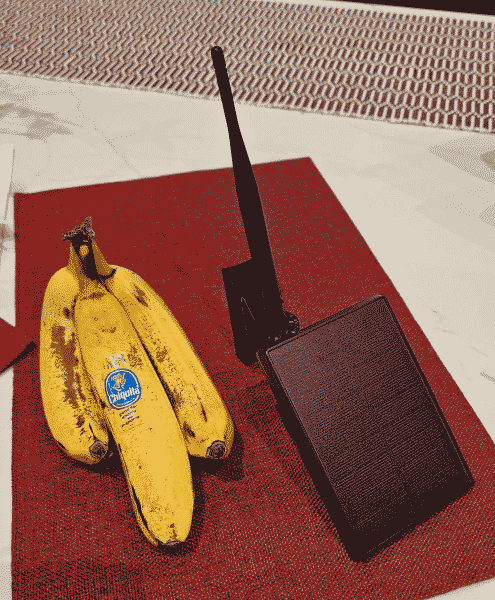
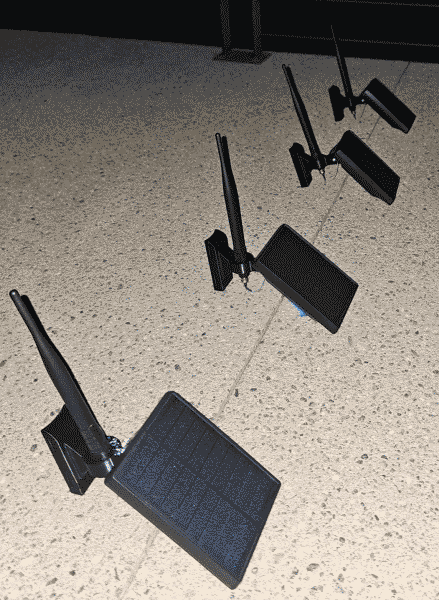
Recently I constructed four do-it-yourself Meshcore repeaters, one of may be seen at right next to some bananas to show scale. Two of these repeaters have been placed into service and seem to be working well. This article describes the planning and construction process.
A fellow Meshcore enthusiast introduced me to the RAK WisBlock Harbor Breeze Solar Light Enclosure Hack. The idea is that the Harbor Breeze light from Lowes gives you a solar panel and a weatherproof enclosure and an 18650 lithium-ion battery as well as charging circuitry. You purchase the light (which costs about $10) and then throw away everything except the enclosure.
Sourced from anywhere else, the battery, charging circuit, solar panel and weatherproof enclosure would have cost more than $10. Go figure.
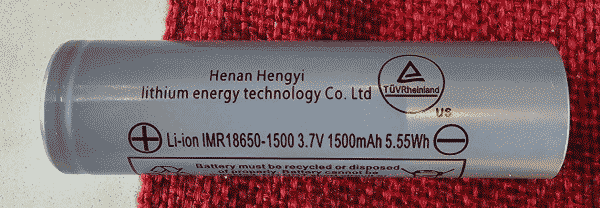
The battery stores about 5½ Watt-hours, so it should be able to power the LoRa controller for at least 100 hours even with no charging. (By comparison, my Seeed Solar Node repeaters should be able to run for more than three weeks with no charging.) If you are lucky, the sun will come out at least once or twice during any 100-hour interval, leading to continuous operation.
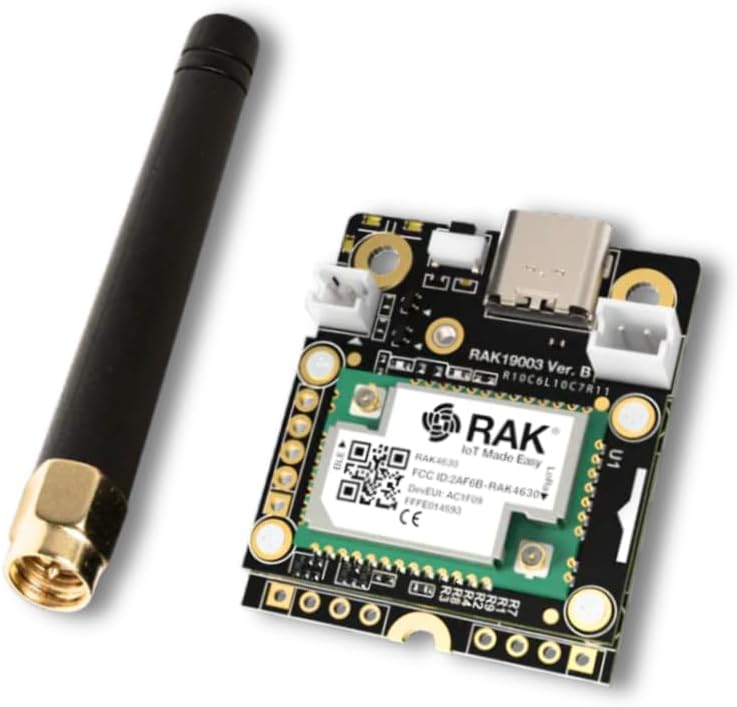
The controller that I chose is the RAKwireless Mini Meshtastic Starter Kit US915 RAK19003 + 4631 SKU 115093 which costs $32.
It uses the power-sipping nRF52 controller. It has a nice four-pin I2C bus with ⅒-inch spacing.
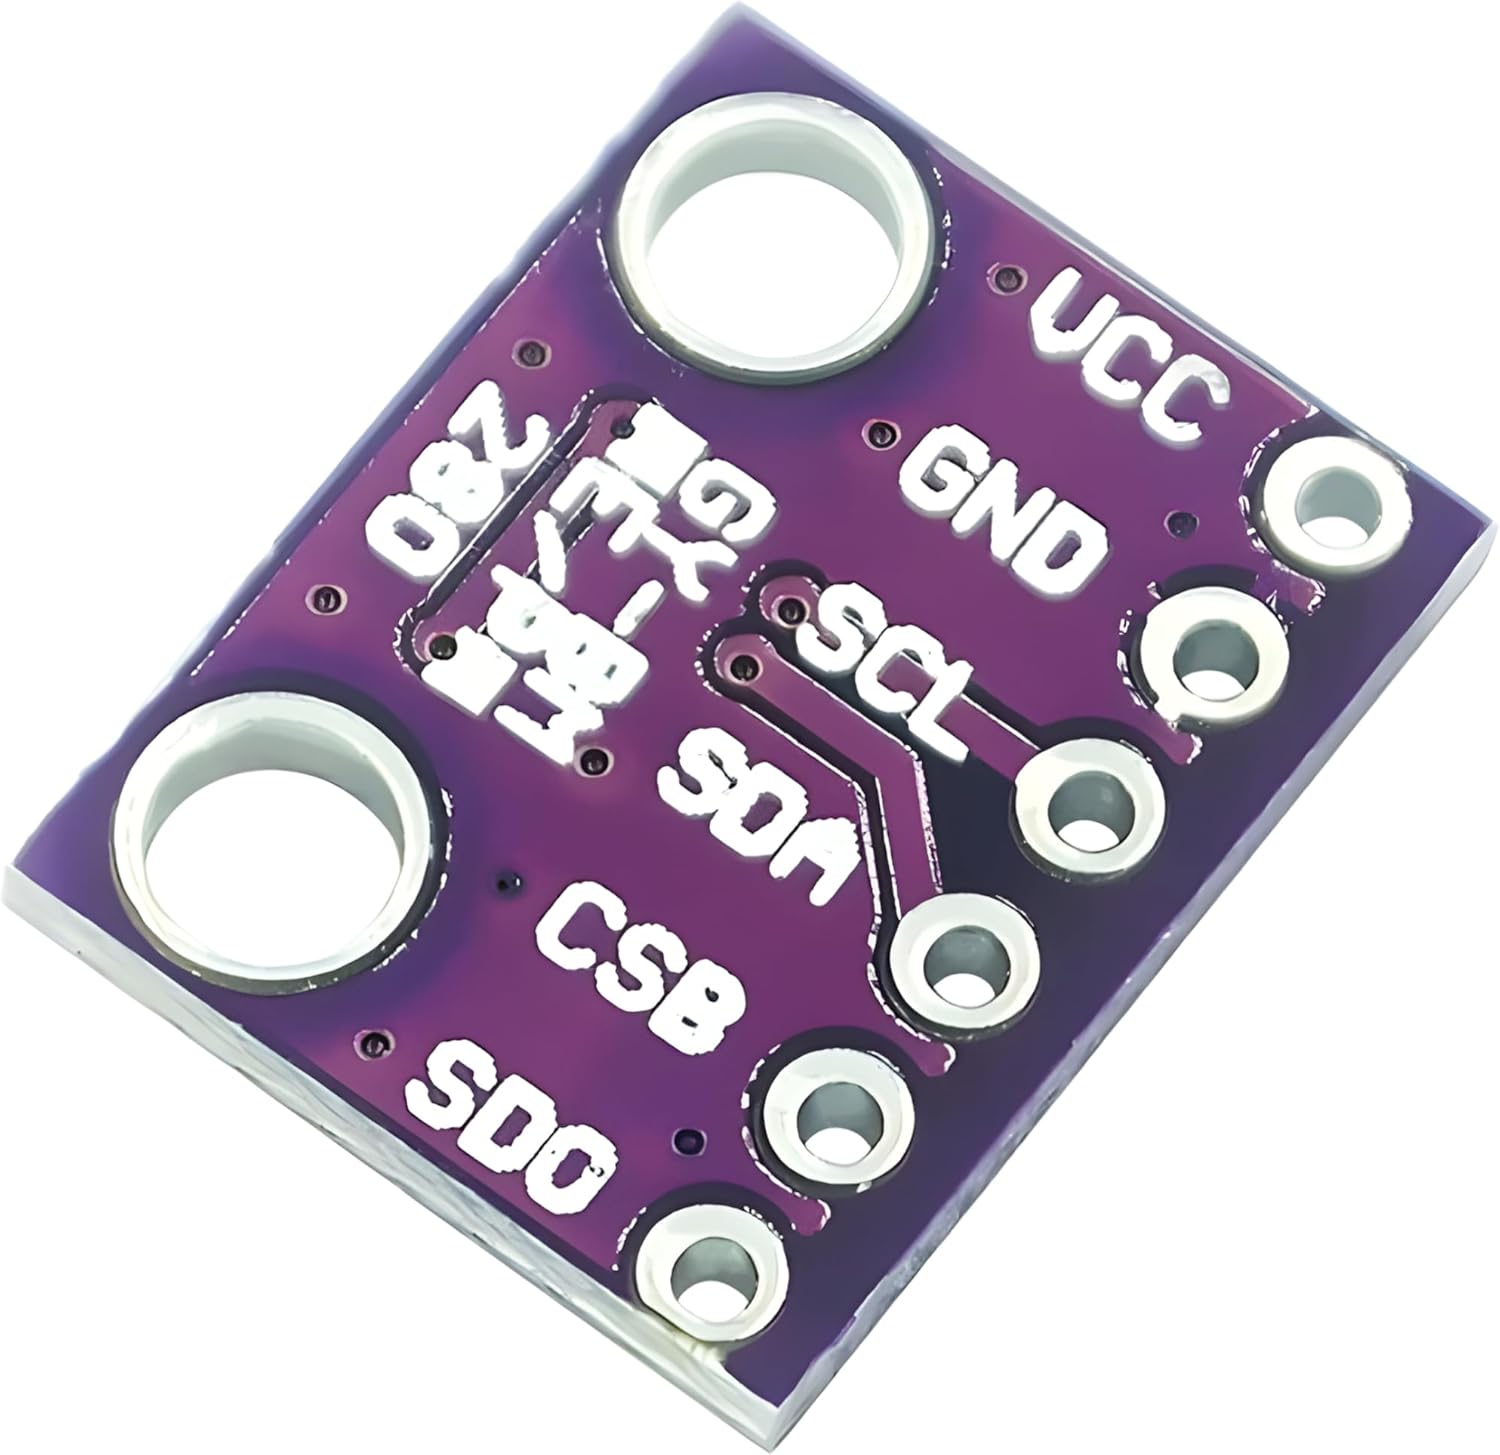
I decided to add a BME280 sensor (providing humidity and barometric pressure) to these DIY repeaters. (You can see an earlier article in which I added a BME280 sensor to my Seeed Solar Node repeaters.) The chief thing to watch out for is that the 4631 controller kit provides only 3.3V, not 5V, so it is important to use a sensor board that can run on 3.3V. A suitable board is available for about $6 on Amazon here. The good luck about this is that the same four-pin I2C bus with ⅒-inch spacing is provided here as on the controller board. So I was able to use a four-pin header strip to mount the sensor board directly to the controller board.
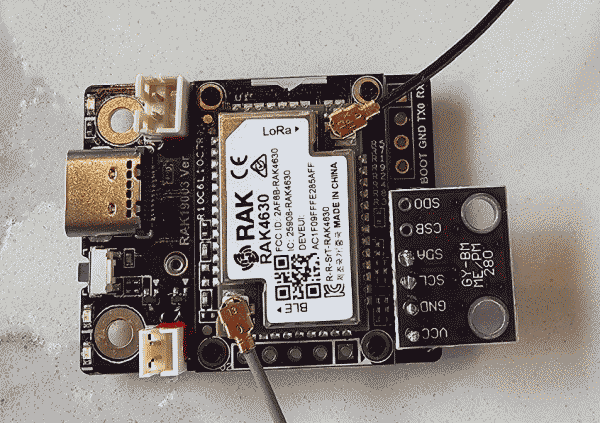
You can see the successful header-strip mounting of the sensor board to controller board here.
The nice way to connect power to the controller board is with a cable with a JST-PH 2-mm 2-pin female connector, available here on Amazon. Just watch out that the polarity of the connector on the controller board is backwards. So when you are soldering this cable to the battery holder, connect red to negative and black to positive.
I chose to use a 3-D printed mounting bracket from Etsy at $8.
I chose to use a 3-dB rubber antenna from Amazon at $6. It came with a LoRa antenna cable that fits perfectly to the LoRa connector on the controller board. I taped the antennas with self-adhering silicone tape, to keep out the weather and to preserve SWR, as discussed here.
Here were the assembly steps:
- remove the adhesive sticker from the solar panel;
- cut the LED light loose from the solar panel enclosure, and discard the LED light;
- let the solar panel charge up the battery;
- solder the battery cable to the battery holder (doing it backwards as mentioned above);
- remove the battery from the battery holder;
- connect the provided bluetooth antenna to the controller board;
- bring the LoRa cable in at the existing opening where the light power cable used to enter:
- connect the LoRa cable to the LoRa port on the controller board;
- connect the antenna to the LoRa cable (this is important because you need to avoid powering up the controller if it does not have an antenna connected);
- solder the BME280 sensor to the controller board using a four-pin header;
- replace battery into its holder;
- power the controller using a USB cable from a computer;
- use the Meshore web site to bring up the flasher;
- erase the controller firmware;
- flash the Meshcore repeater firmware;
- use the USB repeater configurator:
- set a temporary device name;
- write down the name somewhere;
- create public/private keys;
- store the public/private keys somewhere;
- set the radio to the appropriate region (for me, it is “US”);
- initially, set short advert intervals (later set them to be infrequent);
- set an imagined GPS position;
- sync the controller clock to your phone or computer time;
- set up access control;
- set an admin password;
- set a guest password of “hello”;
- disconnect the USB cable;
- connect the battery cable to the controller board;
- insert the battery into its holder;
- test remote administration;
- check that the repeater status looks normal;
- check that administrator telemetry yields humidity and pressure;
- check for existence of zero-hop neighbors;
- send an advert flood.
When I was done, I had constructed four repeaters.
Leave a Reply