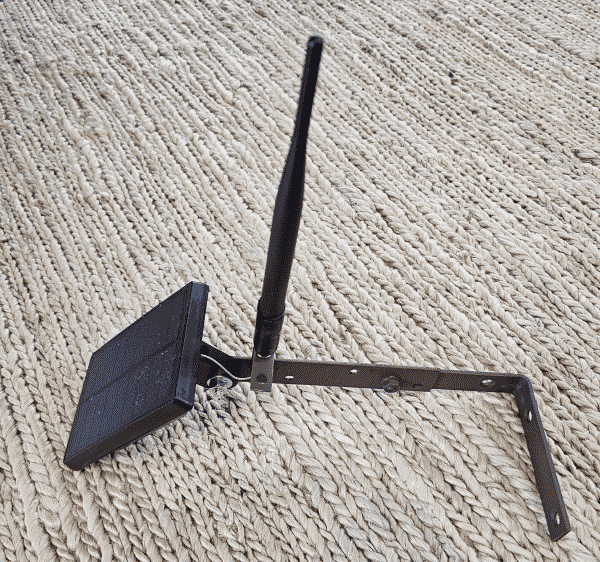
Anybody who gets involved in setting up a LoRa mesh network (for example Meshtastic or Meshcore) eventually encounters the Harbor Breeze Solar Light Enclosure Hack. The hack is that you go to Lowes, purchase a 60-lumen solar powered outdoor light for $10, discard most of it, and add a LoRa mesh controller and antenna. The result (blog article) is a relatively inexpensive LoRa mesh repeater seen at right. The original hack uses a RAK WisBlock controller (RAK link, Rokland link, Amazon link) that costs around $32. In this article I describe how to do the hack using a Seeed Wio controller (Seeed link, Amazon link) that costs around $14 when purchased from Seeed.
First a bit of background, and then I discuss the new approach using the Seeed controller.
The earliest LoRa mesh repeaters use the Espressif ESP32 ecosystem of controllers and radios. This ecosystem has the advantage of being very inexpensive, but has the drawback of running down the battery fast. (Nowadays the best use case for a LoRa mesh repeater that uses an ESP32S3 controller is in situations where you have some external power source, and will not be relying upon solar power.)
Then the Nordic nRF52 ecosystem of controllers became available. These controllers conserve battery life. An active idle state of an ESP32 controller might use 10-20mA, while an active idle state of an nRF52 might use a mere 1.5mA. Said differently, for a given amount of battery resource, the nRF52 device might run ten times longer than the ESP32 device. But this longer battery life comes at a price — the Nordic chips cost a lot more than the Espressif chips.
By the time of Tavis Gustafson’s “hack” article cited above, the nRF52 controllers had become available, so he used that kind of controller.
Lurking in the background of this discussion is the challenge that if you are going to pursue this hack to construct a do-it-yourself repeater, you need to somehow find a controller that is small enough to fit into the very limited free space inside the weatherproof enclosure.
By now I have constructed half a dozen DIY repeaters, all using the RAK WisBlock controller. The parts cost of each repeater is roughly:
- $32 for the controller
- $10 for the Harbor Breeze light from Lowes
- $6 for an antenna and cable
- some cost for mounting hardware depending on where the repeater is to be deployed.
In round terms, the parts cost might be around $50 per repeater. In contrast, the off-the-shelf repeater that I have deployed four of (the Seeed SenseCAP Solar Node P1-Pro) costs around $96. (The potential drawback to the SenseCAP Solar Node is it transmits only at the 22dB level (only around 180 mW).)
Also lurking in the background of this discussion is the substantial labor cost that gets spent to construct a DIY device, and the fact that the $90 device has perhaps eight times more battery capacity than the Harbor Breeze device.
This now brings us to today’s topic, which is the notion of using the less expensive Seeed Wio controller ($14 instead of $32) for this hack. It offers the prospect of bringing the parts cost per repeater down from around $50 to maybe $32. (Would you like to win one of these Seeed Wio controllers? Attend the upcoming inaugural meeting of ham radio people as described here.)
A first step in considering a migration from the RAK WisBlock controller to the Seeed Wio controller is to check to see whether the latter will even fit into the Harbor Breeze housing. The answer turns out to be “yes”, but just barely.
The next thing is to figure out how to connect the solar panel and battery to the controller, while maintaining the ability to monitor the state of charge of the battery. Here we need to review the connections as suggested in the “hack” article.
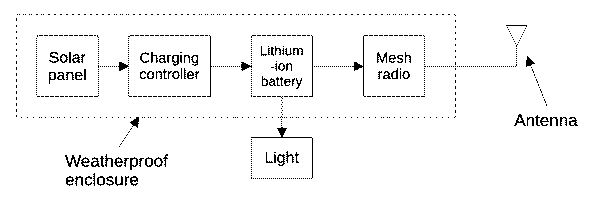
As mentioned above, we start with the Harbor Breeze light, which consists of the weatherproof enclosure that is connected to a light. The first thing we do is discard the light. What remains is the weatherproof enclosure, containing a solar panel and charging controller and lithium-ion battery (with a form factor of 18650). In the “hack” article, the reader is invited to solder a wire to each of the battery holder terminals, and to connect those wires to the battery power terminals of the RAK WisBlock controller. (I discuss this in some detail in the earlier blog article.) This is very easy to do because the controller provides a two-pin connector.
With the Seeed Wio controller, the main easy way to connect power to the device is via a USB C cable. But there are at least two drawbacks to trying to use this approach. One is that the USB power (normally a nominal 5V) passes through a diode on its way to the main circuitry, so there is a stepdown of perhaps 0.6V, which would not be so bad except that here the power source is a battery at maybe 3.7V, so we would be down to only 3.1V by the time the battery power would reach the electronics. That might not be enough to reliably power the electronics which depends on a 3.3V power supply.
Another potential drawback is that to use this approach, one would need to sacrifice a USB cable or find a source for USB plug pigtails.
The Seeed Wio controller is made up of two circuit boards — an nRF52840 processor board and an SX1262 LoRa radio board. You can see their schematic diagrams here and here.
Study of the schematic diagrams reveals that the normal way to provide power to this device (if you are not using the USB-C port) is to supply five volts to these pins in the Wio interface:
- pin 14 – +5V
- pin 13 – ground
I tried this, approach, connecting the Harbor Breeze battery to those two pins. It seemed to work pretty well except that the controller would report a battery state-of-charge of zero. This is not much help if you have a goal of logging in remotely at the repeater from time to time to check its battery status. And of course we had the further drawback that the battery is only providing a nominal 3.7V to circuitry that was designed to make use of 5V.
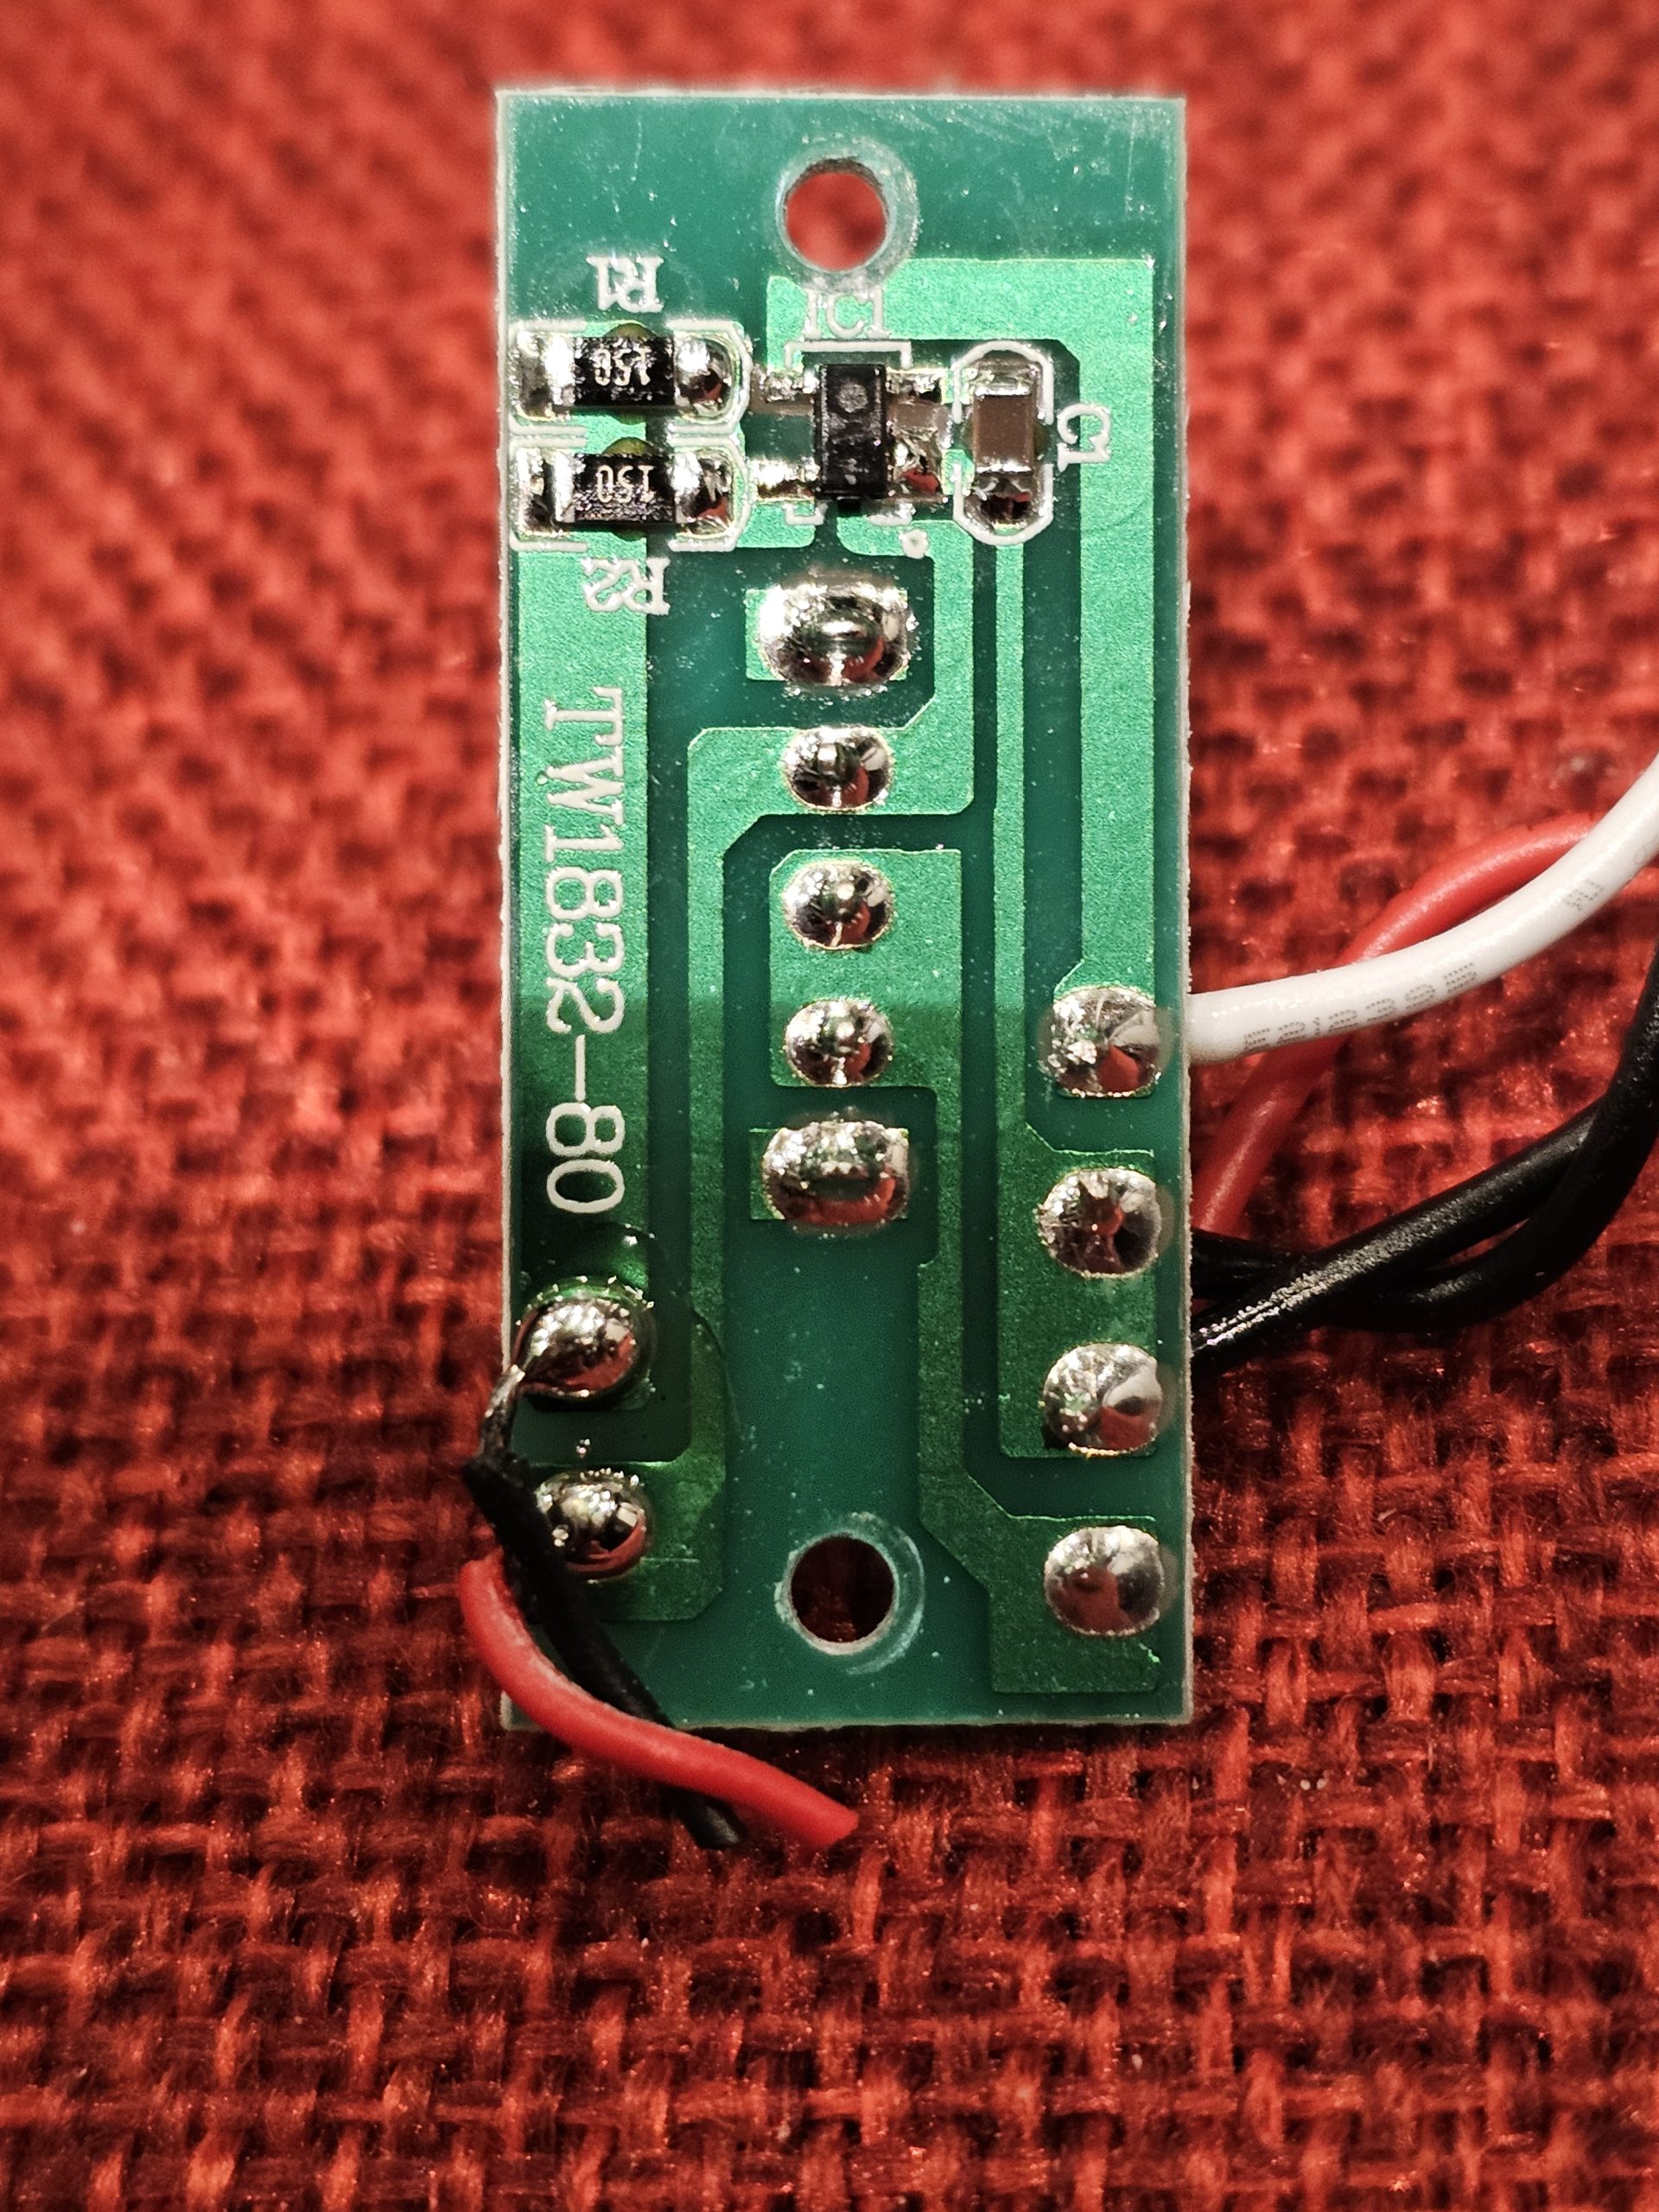
It is helpful at this point in the discussion to remind ourselves how the Harbor Breeze product connects its solar panel and battery. The connection is through a charging controller seen at right. It has a five-pin IC that modulates the (nominal) 5V output of the solar panel so as to avoid overcharging the battery (discontinuing charging by the time the battery is up to around 4.2V). (It also shuts off the LED light during the day.)
What I decided to do is disconnect the Harbor Breeze charging controller entirely, and to make use instead of the charging controller (a BQ25101 IC) that is provided by the Seeed Wio device. Close inspection of the underside of the nRF52840 processor board reveals two pads marked “BAT+” and “-“.
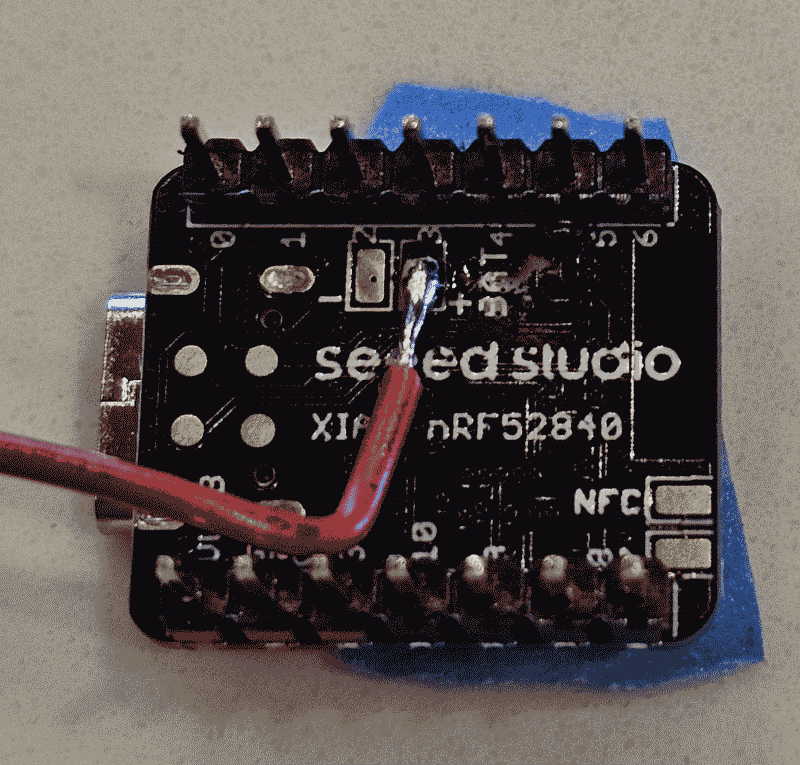
I soldered a wire to the “BAT+” pad as shown in the photo at right. (The best technique for this is to use a clean and well-tinned soldering iron tip to tin the pad. Then tin the wire and quickly tack the wire to the pad. The goal is to avoid overheating the components on the processor board.)
I soldered the negative solar-panel lead to the negative terminal of the battery holder, and ran a wire from there to pin 13 of the Wio interface. I connected the positive solar panel lead to pin 14 of the Wio interface. And I ran this BAT+ wire as seen here to the positive terminal of the battery holder. The result is that it is the nRF52840 processor board that receives the power from the solar panel and determines how much of that power is used to charge the battery. And the (nominal) 3.7 volts from the battery is what gets passed to a voltage regulator on the nRF52840 processor board to deliver 3.3V to the electronics.
The remaining construction steps are the same as described in the earlier blog article. This includes flashing repeater firmware onto the controller, setting up the controller for remote administration, and connecting a suitable antenna and mounting hardware.
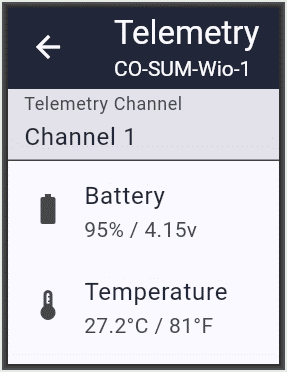
I have by now built two of these Harbor Breeze repeaters using the Seed controller. Here is a remote-administration telemetry report from one of them. As you can see, the battery is said to be at 95% charge and the processor temperature is said to be at 27°C (81°F).
The actual ambient temperature is closer to 60°F, but I guess the direct sunlight hitting the repeater has warmed it up a bit.
I welcome comments. Please post a comment below.
Leave a Reply