(Update: I had to swap out this repeater for a new one as you can read about here.)
Today I installed a new Meshcore repeater in Summit County, Colorado. It is called CO-SUM-PTA-RE and it is a Seeed Solar Node. It reaches points in Frisco, Silverthorne, Dillon, Mesa Cortina, and Smith Ranch. In this article I talk about some of the planning and preparations, the installation process, and some of the results.
I took as my starting point the known location of an existing Meshcore repeater called CO-SUM-RUB-RE which is near Silverthorne on the west side of the Blue River valley. As discussed in this blog article, this existing repeater largely serves users on the east side of the valley. So the natural next place for a repeater would be on the east side of the valley, to serve users on the west side of the valley.
Site selection. It is not easy to pick a place to put a repeater. As a general matter it is desirable that the repeater be at as high an elevation as posssible, to maximize its geographic coverage. This nearly always means that no electric power is available, meaning the repeater will need to be a solar node. Colorado is in the northern hemisphere, meaning that the solar panel needs to face south and needs to be mostly unshaded. One must also consider potential nearby sources of interference, given that the ISM band being used (900 MHz) is free for anyone to use, and someone else might be using it. A siting mistake could yield a “noise floor” that is too noisy for the BLE protocol to work its magic.
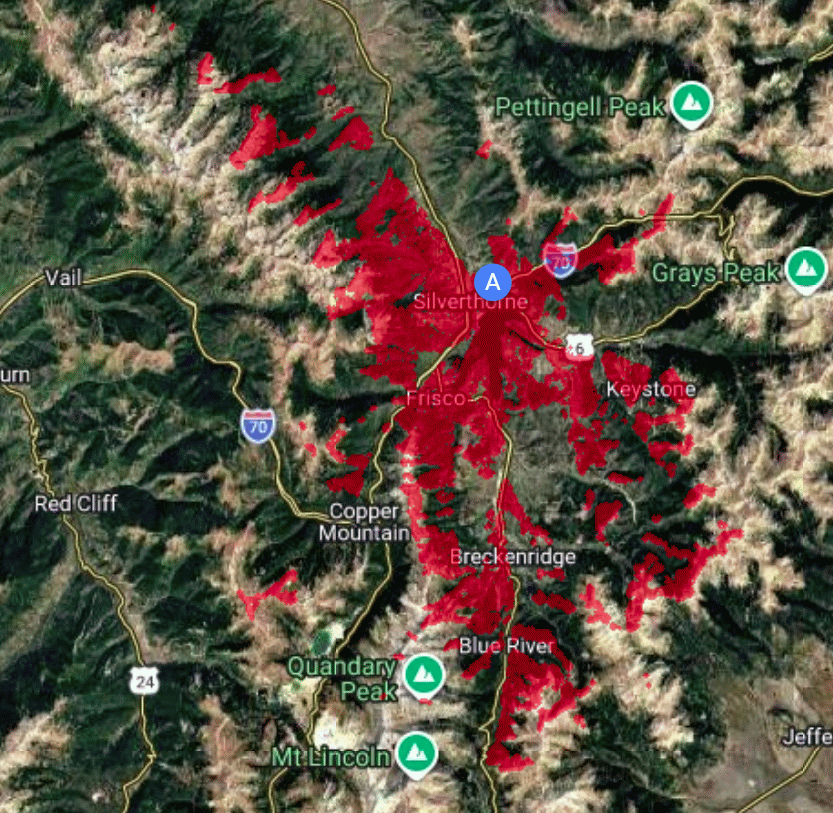
Siting tools. There are online siting tools that try to predict geographic coverage for a proposed antenna site. At right you can see the prediction for my proposed site, from https://app.meshcore.nz/. The red shading shows predicted coverage areas, adding up to many tens of square miles including most of Silverthorne and Frisco.
But no siting tool can replace an in-person site evaluation by someone with RF experience, such as a radio amateur or electrical engineer. The repeater will be of little use unless it has line of sight to other existing repeaters (here, for example, the CO-SUM-RUB-RE repeater) and has line of sight to places that need coverage. In a mountainous area like Summit County, this can be very tricky. A siting mistake of just a few feet might lead to a newly installed repeater being of no benefit to anyone, due to some bad luck about terrain or thick forest. I spent many days studying topo maps and hiking to several candidate sites.
For today’s installation I selected a site in the Ptarimigan neighborhood area at about 9500 feet above sea level. I was in an area with a stand of trees, meaning that I needed to pick a southernmost tree in the stand of trees. I used a handheld node (the Wio Tracker L1 Pro mentioned below) to confirm an 8.5-dB connection to the CO-SUM-RUB-RE repeater. I was pleased to see that this location also has an 8-dB connection to a repeater called CO-SUM-WB-RE.
One worry is that snowpack might get deep enough to cover up the repeater. I had only a limited ability to control this worry, since I had to hike to the site and could not conveniently bring a ladder with me. So the mounting location was necessarily going to be no more than about six feet above ground.
Hardware preparations. It was easy to choose the hardware, namely the Seed Studio SenseCAP Solar Node P1-Pro (manufacturer’s page). I already had quite a bit of experience with this device and so I already knew of its qualities that make it a good choice. It has four 18650 batteries adding up to a capacity of about 13 Ampere-hours. The batteries are lithium-ion with a nominal 3.7 V. The controller is the nRF52840 which draws very little power compared with the ESP32 controllers used in the past. The battery life is likely to be well over two weeks in the absence of any solar power. The five-watt solar panel is likely to be able to recharge the battery fully almost every day even with partial shading and overcast skies. The device costs $140 on Amazon, but costs less than $100 when ordered direct from the manufacturer.
The chief environmental worries, over which I have very little control, are:
- the low winter temperatures, often well below 0° F, and
- the above-mentioned risk of snowpack covering up the device.
The battery chemistry is said to permit discharge (power to the electronics) down to -40° C (which is the same as -40° F). The chemistry is said to permit charging at or above 0° C (32° F). A chief risk, then would be the event of an extended numbers of days below 0° C. Given the likely battery life of two or more weeks, however, one can hold out hope that the ambient temperature would at least sometimes get up to 0° C during the two weeks, permitting solar recharge.
I went to quite a bit of trouble to install a BME280 sensor for temperature, humidity, and barometric pressure using the node’s Grove I2C port (blog article).
Seeed provides a 2-dB gain rubber antenna with a hinge permitting various antenna angles. I knew, however, that if the antenna is not straight, the SWR gets much worse, so I wanted to keep the antenna straight. I also wanted to keep water out of the hinge area of the antenna. So I wrapped the hinge tightly with self-fusing silicone tape as you can see in the photographs below showing the installed repeater.
Some people choose to replace the stock antenna with a higher-gain antenna, but I did not want to do this, given that I was probably not going to be able to keep the antenna exactly plumb and given that many user coverage areas would be at elevations as low as 8700 feet (800 feet below the repeater). So I retained the stock antenna. As you will see below, even with the stock antenna I was able to reach places that were 7 km (4 miles) away with strong signals, and I was able to reach places at a lower elevation than the repeater.
The node comes with a very nice aluminum mounting bracket with a D-hole for the antenna cable and with an optional pipe-mount bracket and pipe clamp. Here I was planning to mount to a tree, so I omitted the pipe-mount bracket and clamp.
The intended site for today’s repeater is a location that requires half an hour of hiking to reach, but the location is likely to be completely unreachable for many months each winter (except with perhaps 45 minutes of snow-shoeing). So I felt I should not scrimp on quality with this repeater, and I felt I ought to test it fully in the days leading up to the installation.
Software preparations. The node had been preflashed with Meshtastic firmware, and I pretty thoroughly tested the node for its Meshtastic functions, confirming that the hardware works. I then erased the firmware and flashed it with Meshcore repeater firmware. The Meshcore firmware is version v1.15.0-dee3e26, build 19-Apr-2026.
In the days leading up to today’s installation, I did quite a bit of acceptance testing of the node for its Meshcore functions. (This is the temporary node that I used in Sonoma County as described in this blog article.)
One of the most important things is to plan ahead for what will eventually be remote administration. The idea is that from anywhere in the Meshcore network, I would be able to carry out administration of the repeater. In the days leading up to installation, I did a lot of practice to make sure that I knew how to do this and how to minimize making stupid mistakes that might remotely “brick” the device.
I also needed to plan ahead for testing of the repeater at installation time. With the repeater powered up after installation, I would need to test it to make sure that it was indeed connecting to the existing CO-SUM-RUB-RE repeater. This Meshcore repeater firmware does not permit using Bluetooth to connect to the device. So the only choices for on-site testing of a newly installed Meshcore repeater are a USB connection or the above-mentioned remote administration. To use the USB connection I would have needed to bring along a notebook computer, but that would have been heavy and bulky and I was already going to be carrying a very heavy work bag. So I resolved that the way that I would test the repeater connectivity after installation is remote administration.
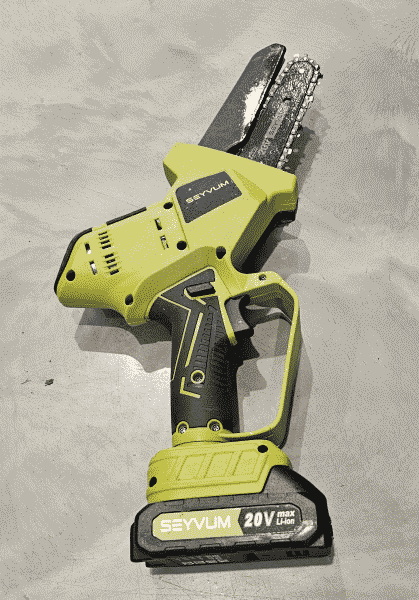
The installation. As mentioned above, it is important that the solar panel be unshaded for most of the day. This required picking a southernmost tree from among its stand of trees. But it also required that I limb the tree somewhat, so I brought along a cordless mini chain saw, shown at right.
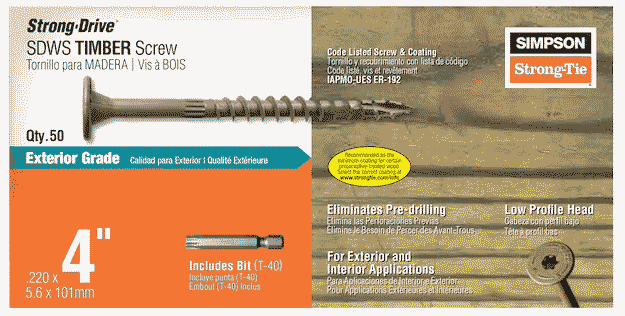
I brought along some very serious four-inch number 12 timber screws, seen at right. These come with a matching T-40 torx bit. (I used an ordinary cordless drill with this bit, and it turned out to be just barely up to the task. Next time I will use a hex impact driver.)
The mounting holes in the aluminum bracket were made for number-10 screws, so these screws were too big for the holes. But this was not a problem since these screws are self-drilling through almost any materials including tree trunks and aluminum sheet stock. As you can see, the screw heads are wide, meaning that I did not use the fender washers that I had originally thought I might need.
I needed to know which direction is south. I pretty much already knew which way is south from maps but I also planned to use the compass in my phone to confirm it, so this was one reason to bring my smart phone, despite the fact that there was likely to be poor or nonexistent cell coverage at this installation site..
I needed to be able to do a Meshcore site survey to be sure of line-of-sight connectivity to the existing repeater CO-SUM-RUB-RE, so this was another reason to bring the smart phone (despite the poor or nonexistent cell coverage). I used a companion device namely the Seeed Studio Wio Tracker L1 Pro (blog article) seen at right.
I needed to somehow transport all of these things — the chain saw, the cordless drill, and the repeater itself — to the installation site. A chief concern is that the repeater, on its bracket, with its antenna, takes up quite a volume. If the repeater assembly were to get banged up, the antenna could get damaged. It would be tempting to remove the antenna for transport and to reattach it at installation time. But as any radio amateur or electrical engineer knows, if an RF transmitter is turned on without a proper load (a suitably tuned antenna or an impedance-matched dummy load), the transmitter is likely to destroy itself. If I were to remove the antenna for transport, and if the power-on button were to get bumped, this would ruin the repeater. To be safe, I simply left the antenna in place for transport.
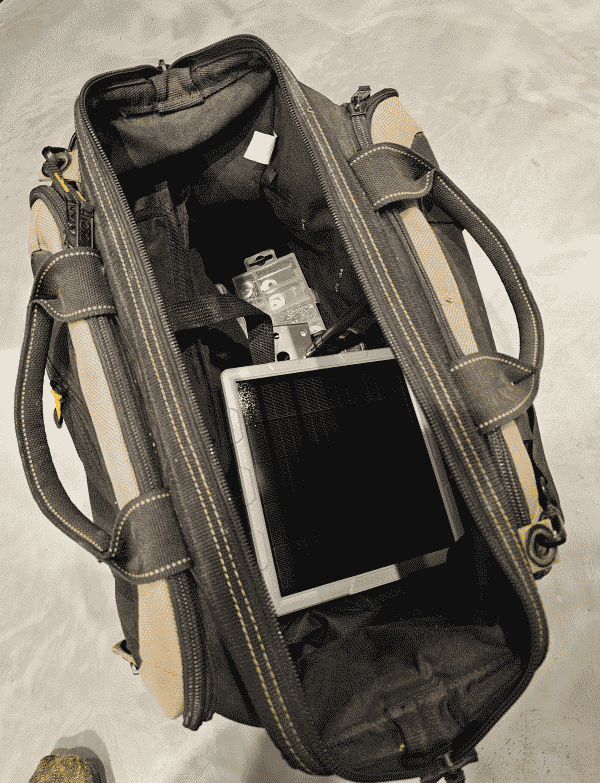
This meant that I needed to keep the device from getting banged up. I used a large work bag with a shoulder strap, shown at right. I was able to close up the bag in a ways that kept the repeater and its antenna out of harm’s way, resting on top of the chain saw and cordless drill.
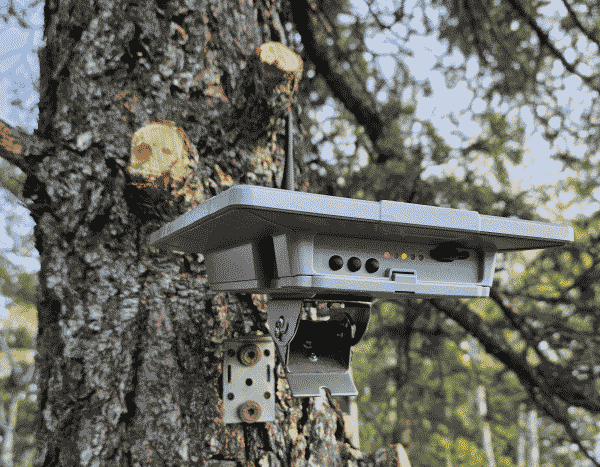
Installation. From the trailhead it was a brisk hike on trail for half an hour and then another twenty minutes through sage meadow to the installation site at a stand of trees. I selected a tree based on the line-of-site signal strength test and based on the desired coverage areas. I limbed the tree and commenced mounting the device to the tree, as seen at right. The timber screws effortlessly enlarged the mounting holes from a number-10-screw opening to accommodate these number-12 screws. The screws effortlessly screwed into the tree trunk with no need for pilot holes. For this part of the work, as you can see, I loosened the angle mount for the solar panel and flipped the solar panel up to get easy access to the screw locations.
Eventually I got four screws into place. I then angled the solar panel to aim at the winter sun at this latitude, and tightened the four machine screws for the angle mount. With the repeater powered up, I used the remote administration to check the connectivity to the CO-SUM-RUB-RE repeater. The moment of truth arrived, and I was greatly relieved to see a comfortable 8.5-dB point-to-point link to that repeater. (And I was also delighted to see the hoped-for 8-dB link to the above-mentioned second repeater called CO-SUM-WB-RE.) I was also glad to see the noise floor at a very good (low) level of about -115 dB.
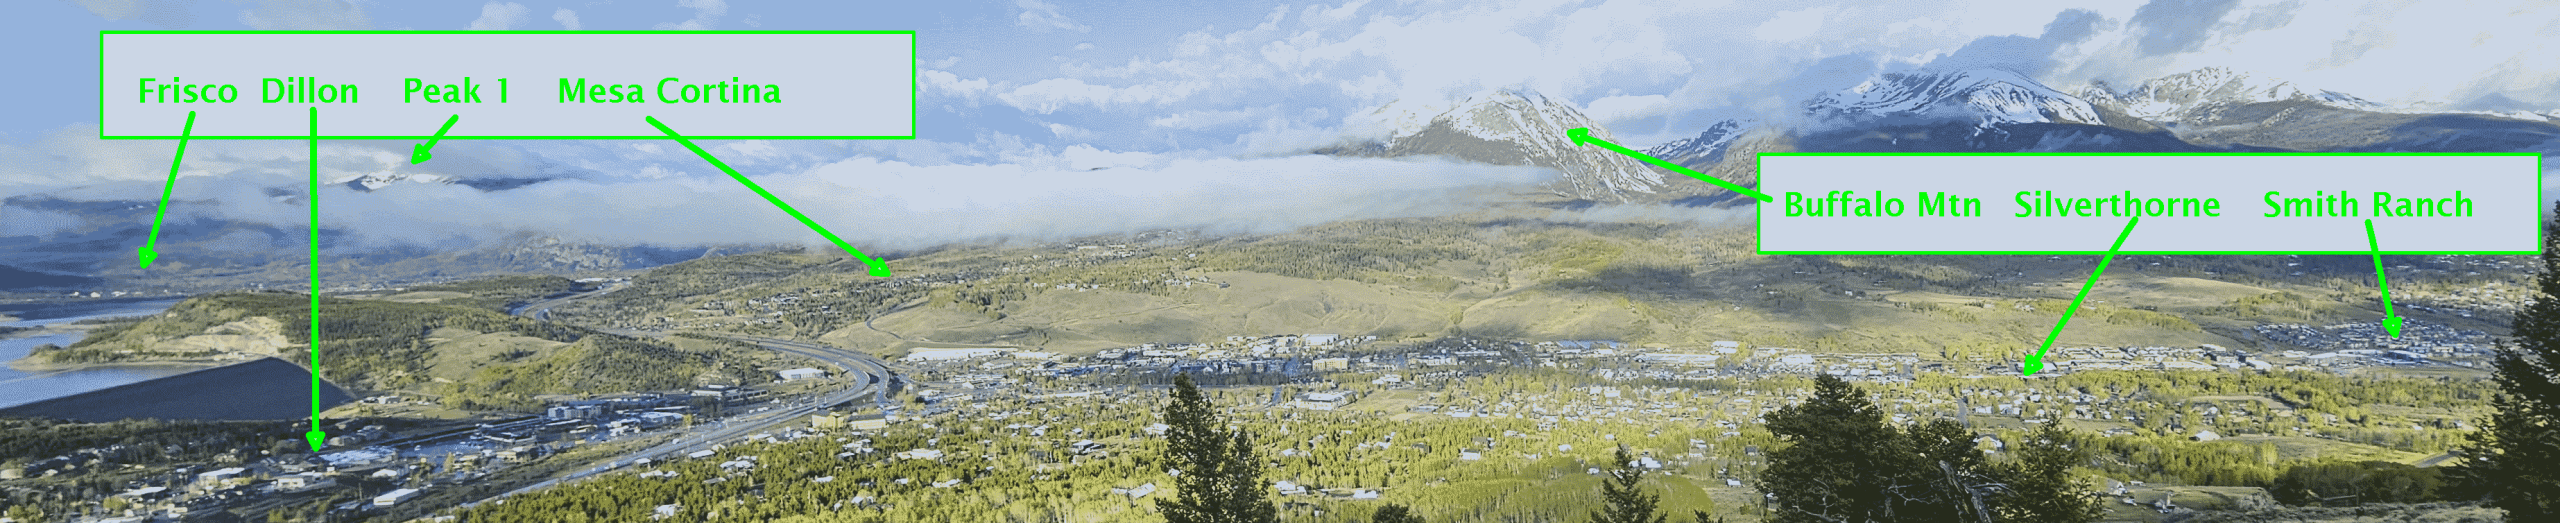
The expected coverage. I then snapped some photos (including the photo at right) showing the expected user coverage areas. This includes parts of Mesa Cortina, Silverthorne, Dillon, Frisco and Smith Ranch. I expect that nearly all of the Mesa Cortina trail will be covered, as well as nearly all of the Ruby Ranch neighborhood. Coverage might extend to Willow Falls.
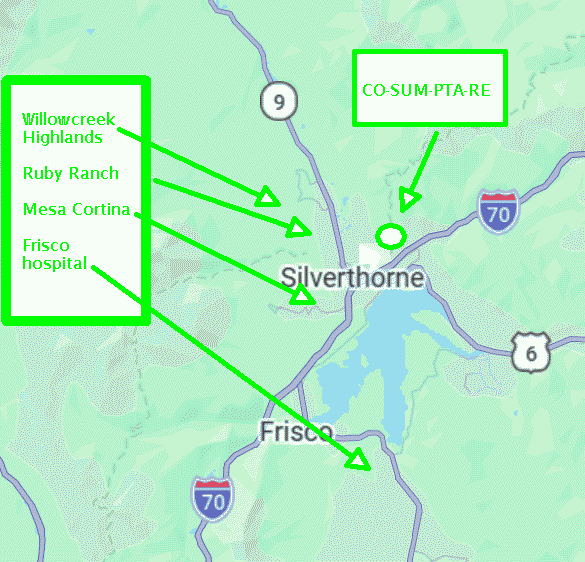
Actual test results. I then went to several locations to get actual signal quality results, including:
- Willowcreek Highlands (1 mile, -0.3 B);
- Mesa Cortina (1 mile, 4 dB); and
- Frisco hospital (4 miles, 1.5 dB).
I was pleased with these results.
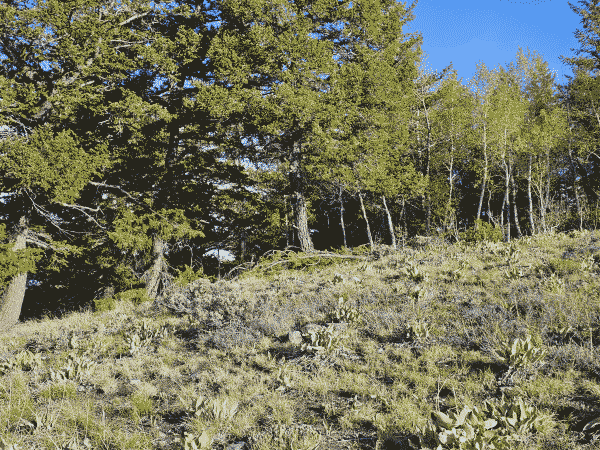
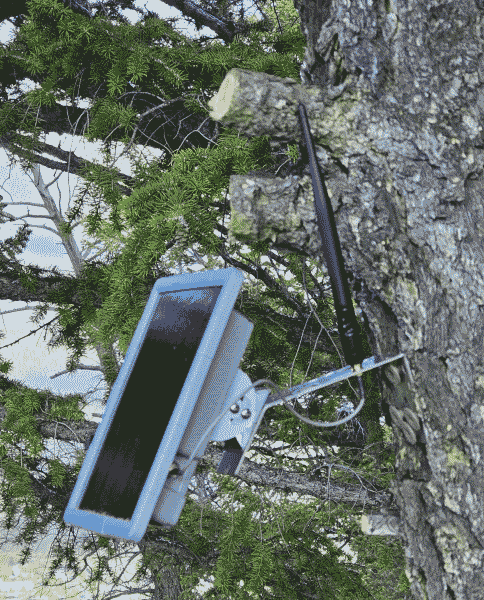
Hopefully the repeater will not attract attention. A chief worry when one is installing a device like this in some remote location is that it might attract unwanted attention, perhaps leading to damage or vandalism. Here is a photo taken from some thirty paces away. Can you spot the device in the photo?
Further testing to do. It will be helpful to go to several places to confirm further possible coverage areas:
- Farmer’s Korner in the direction of Breckenridge;
- Peak 6 at the Breckenridge ski area;
- Keystone Mountain and Independence Peak at the Keystone ski area;
- Prospector Point above Swan Mountain Road;
- the antenna farm area on Lake Hill;
- Mount Guyot; and
- the western portal of the Eisenhower Tunnel.
What’s next? A natural next repeater site to consider would be near the top of the Breckenridge ski resort, hopefully having line-of-sight to today’s new repeater CO-SUM-PTA-RE and hopefully having line-of-sight to most of Breckenridge.
See for yourself. Let’s suppose you have a Meshcore companion device on ordinary US settings. If you are in Summit County’s Meshcore network, see if you can use password “hello” for guest access on the CO-SUM-PTA-RE repeater. Hopefully you will be able to see telemetry values including battery condition, ambient temperature, humidity inside the repeater enclosure, barometric pressure, noise floor, and device uptime.
I welcome comments below.
Leave a Reply