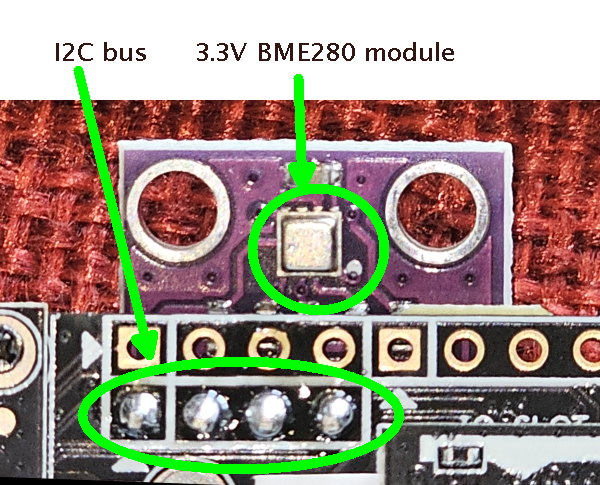
In an earlier blog article I mentioned that it is possible to add a Bosch BME280 sensor to the RAK one-watt LoRa mesh radio. This article details how to do it and how to get the telemetry.
A first thing to realize is that if you wish, you could use RAK’s own Wisblock temperature-humidity sensor, plugging it into one of the Wisblock ports on the RAK19007 baseboard. This has the advantage of being easy to do, with no soldering required. But the sensor does not measure barometric pressure as does the Bosch BME280 sensor. So you could also add RAK’s own Wisblock barometric pressure sensor into another of the Wisblock ports on the RAK19007 baseboard. I do not know whether the Meshcore one-watt firmware would correctly read all three values using the two Wisblock devices.
What I know works is to make use of the Bosch BME280 sensor. It is important to use a 3.3-volt BME280 and not a 5-volt BME280 because the RAK19007 baseboard only provides 3.3 volts.
A first decision is to decide whether to mount the Bosch BME280 sensor board on the “top” side of the RAK19007 baseboard (the side where the two radios are mounted) or on the “bottom” side. I think the best choice is to put it on the “bottom” side so that the Bosch BME280 sensor board will not get in the way if you ever decide you need to swap out the LoRa radio.
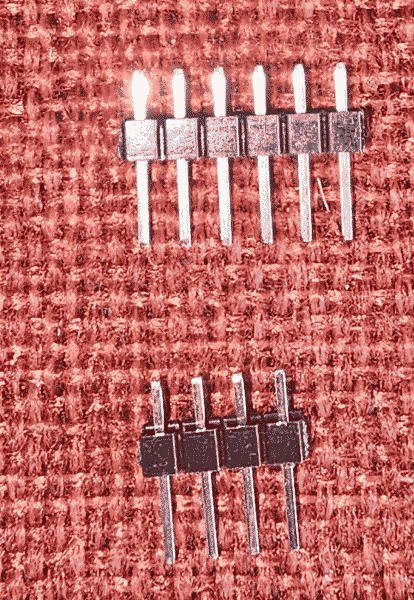
A next step is to break off two pins (as seen at right) from the six-pin header that is provided with the Bosch BME280 sensor board. We can only fit four pins into the I2C bus on the RAK19007 baseboard. (The I2C bus has only four lines, namely VCC, ground, serial clock, and serial data.)
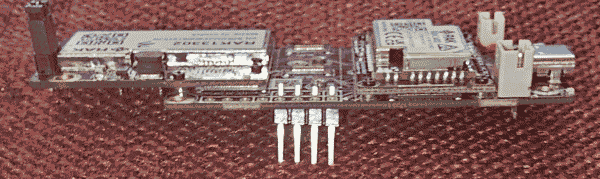
We then set the header into position, extending downwards from the RAK19007 baseboard, as seen at right.
Using a steady hand, we carefully solder the four pins to the baseboard. We need to avoid getting stray solder anywhere else, and avoiding solder bridges between any two of these pins, and avoiding cold solder joints.
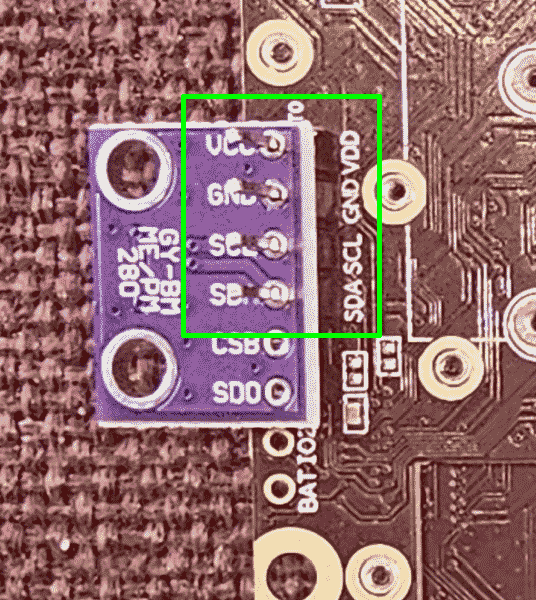
The next step is to position the Bosch BME280 sensor board onto the header pins. There are perhaps sixteen ways to get this wrong. The Bosch BME280 sensor board, which is purple in color, has six through-holes and you need to pick four of them to fit onto the header pins. One could still get this wrong by rotating the purple board 180° or getting it upside-down. The key is to match up the four lines of the I2C bus as silk-screened on the purple board and on the baseboard. Here the match-up is:
- VCC to VDD
- GND to GND
- SCL to SCL
- SDA to SDA
Again using a steady hand, we carefully solder the four pins to the sensor board, avoiding stray solder or solder bridges or cold solder joints.
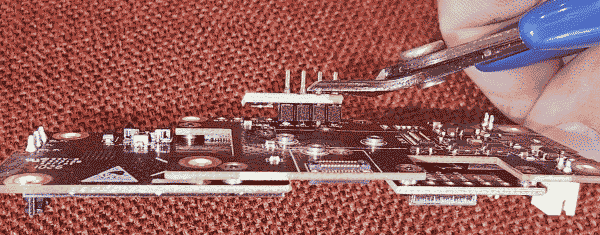
You might think you are done now, but you are not, because you will next need to fit the assembly into a tight space in a Harbor Breeze enclosure. The pins of the header, if not trimmed off, will stick out too far and you will not be able to get the enclosure to close. Here you can see diagonal-cutting pliers being used to trim off two of the four pins. Wear eye protection because the cut-offs will fly across the room. When this is done, trim off off the other two pins.
Now comes the moment of truth. Did I ruin the RAK19007 baseboard by getting it too hot? Did I ruin the Bosch BME280 sensor board? Did I fail to match up the four lines of the I2C bus? Is there a cold solder joint that I failed to notice?
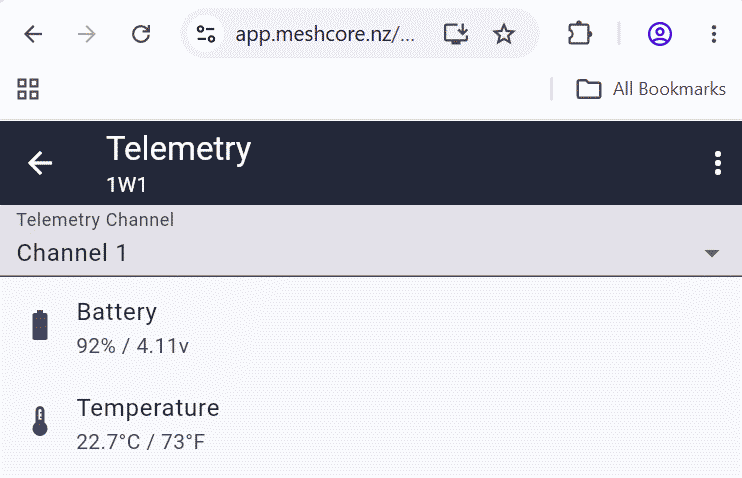
The way to find out is to flash the repeater firmware (here, Meshcore) onto the device and view the telemetry data. If you see only battery status and temperature, this means you screwed up. If you see all four numbers (battery status, temperature, humidity, and barometric pressure) then you correctly enabled the I2C bus. At right you can see what I saw. Rats! I had done something wrong, because there was no humidity or barometric pressure.
Either that or maybe Meshcore RAK one-watt repeater firmware fails to handle the I2C bus correctly (or at all). Which is what I feared, given that it looked like the Meshcore RAK one-watt repeater firmware had been hurriedly adapted from some previous ESP32 firmware.
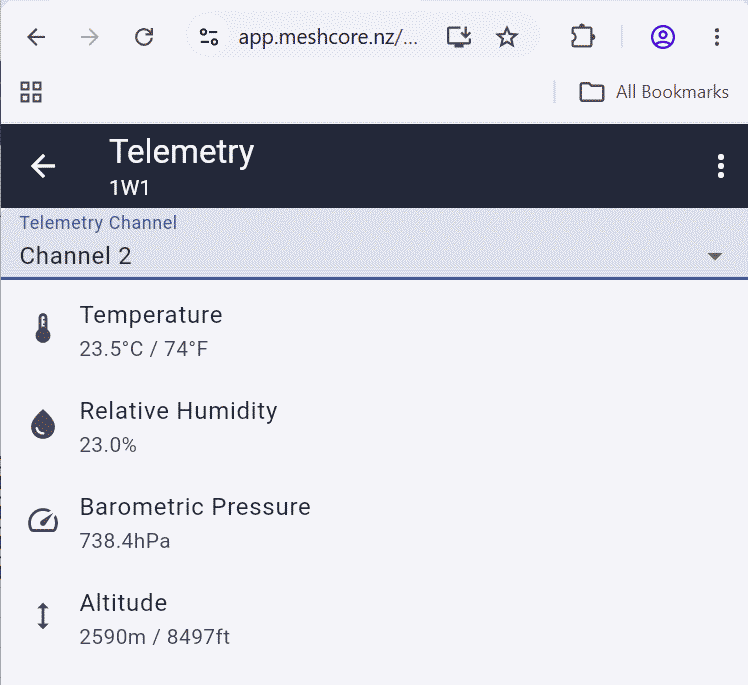
But it turns out that in the Meshcore.io web app, the I2C bus is an Easter Egg. You have to sort of already know where to click, namely the tiny down-arrow at right. If you click there, the Easter Egg appears as shown at right, with telemetry channel 2 now visible.
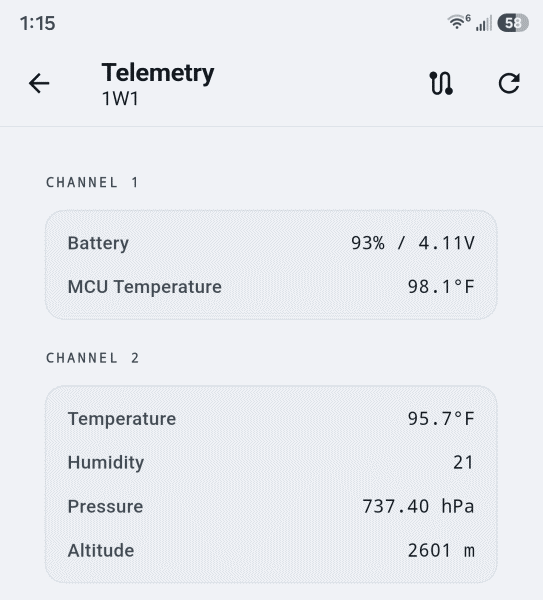
The Meshcore Open android app is more user-friendly, showing both telemetry channels from the get-go, as seen at right.
Why do we care about humidity? Keep in mind that whenever we are constructing a solar repeater, we worry a lot about the risk of moisture getting into the (supposedly) weatherproof enclosure. We caulk around each of the external openings, and we carefully preserve gasket closures. Some DIYers go to the trouble of putting one or more dessicant pouches into the enclosure.
The humidity sensor permits us to reassure ourselves that moisture has not gotten into the enclosure.
Leave a Reply